Thursday, December 02, 2021

Chandelier makeover

My chandelier makeover has been a long project. It was so dirty and crooked that I really wasn’t sure I wanted to keep it. But, I love chandeliers and thought it had potential. So as you know, I took everything off and cleaned it up. The next step was deciding to change the bulbs to LED to I could save 95% on my hydro bill for it. It was running at 400 watts of consumption and with the change it is now using 20 watts. HUGE DIFFERENCE. And to be honest, the 25 watt LED’s are as bright as the 40 watt incandescent bulbs. But then I discovered that the LED bulbs had stamped paint on three sides of the bulbs and a huge silver band that was too side to hide under the plastic ‘candle covers’. I used a scraper and windex to take off the paint, taped the bulbs up and spray painted the silver bands white. It really was an insane amount of fussy work just to make this thing “cute”, but it was so worth it, don’t you think?


Before

 LED bulbs with painted writing on bulb and huge silver band. 

Paint about to be scraped off using this blade

Bulbs after paint removal

Silver bands painted white and bulbs installed

Saturday, November 27, 2021

My house and Feng Shui.

I used to own a Feng Shui store. Dragon Horse in Sidney BC. I loved that store so much. It was amazing and fun. I still have a soft spot for all things Feng Shui and personally practice the traditional Chinese way. It is a wonderful opportunity when you buy a new house to know what the correct Feng Shui layout would be so that you can take that into account when making changes. My house faces south. It doesn’t get better than that. My front door is recessed and you can’t see it when walking up to the house. Bad. Front and back door are not in a straight line. Good. Chi meanders around the house. Good. You also have personal good and bad directions. I have our lists and you can then set up where at tables you sit, couches and sleeping directions. I tend to be really loosey goosey on the couch/sofa part as I tend to just plunk down where convenient at any moment. But the bed direction is very important. 

I cannot wait to get my Asian art and Feng Shui pieces up here. I love the energy and colour of them. 


This coming Chinese Year of the Tiger is going to be a good one. 
So I am preparing for that. 

Saturday, November 20, 2021

What I’ve learned. Removing wallpaper 101

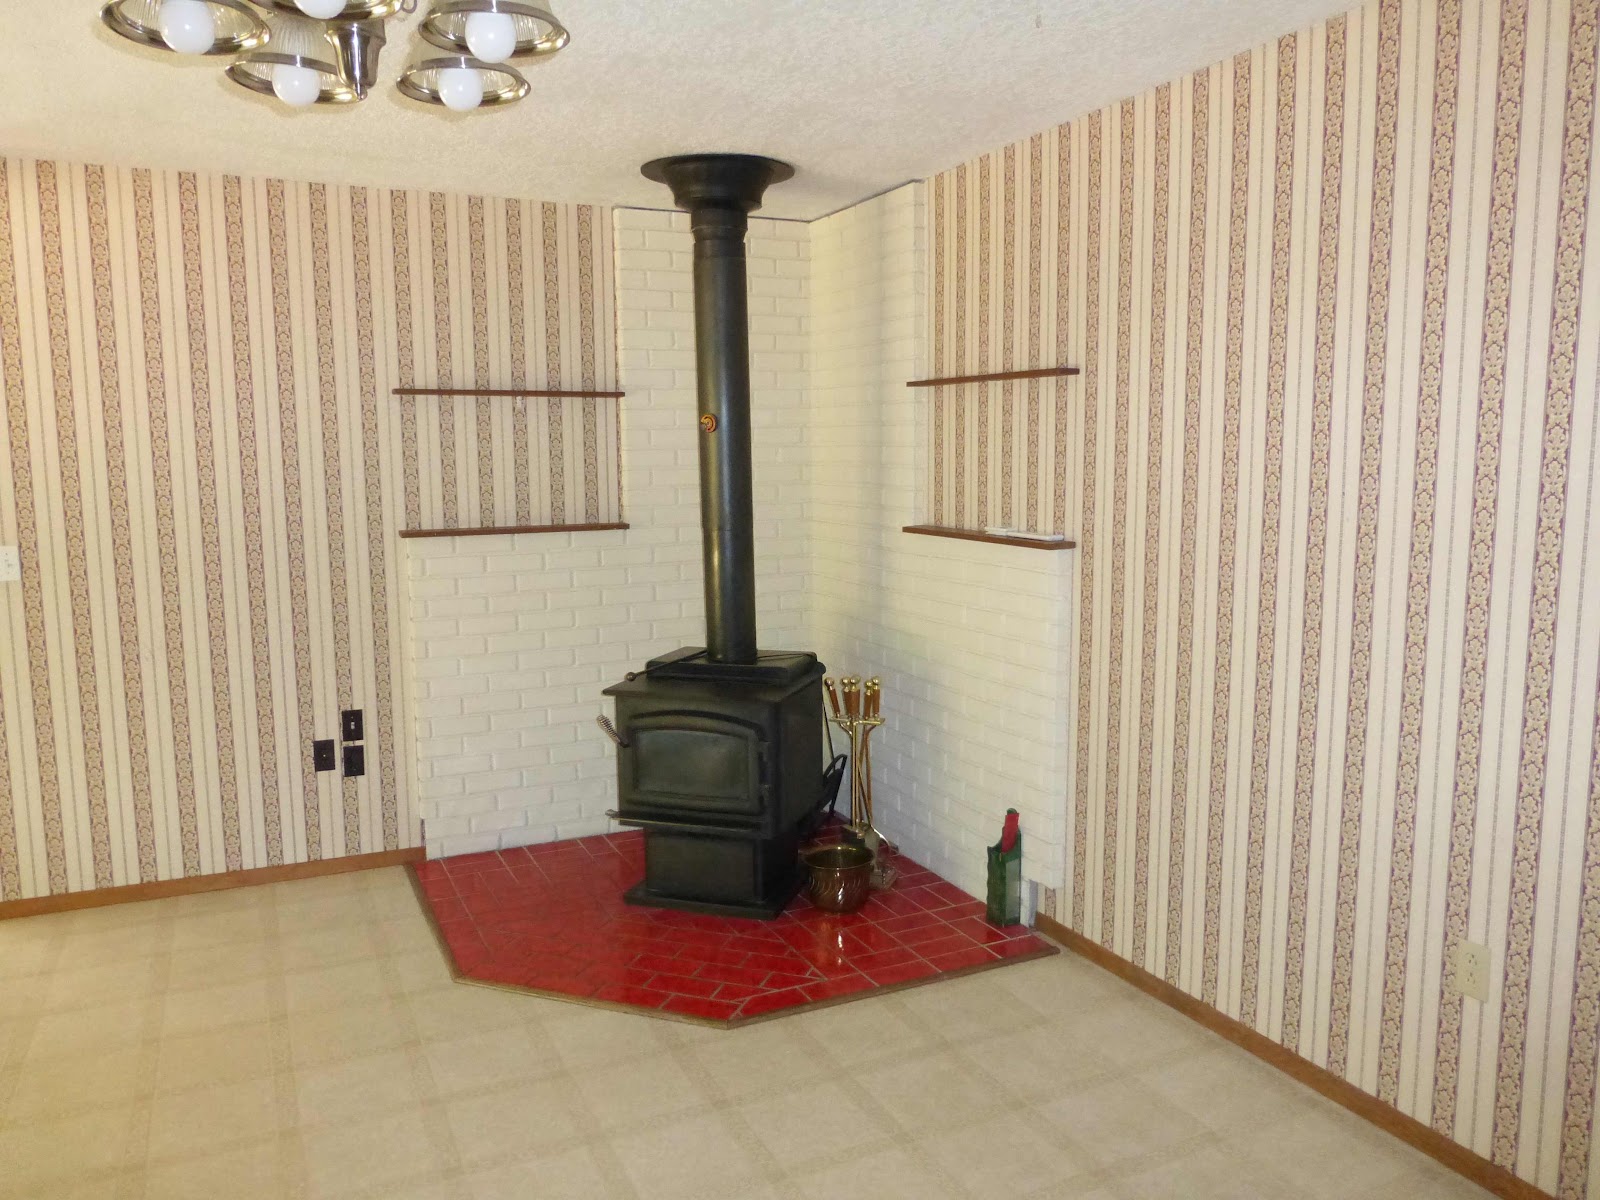
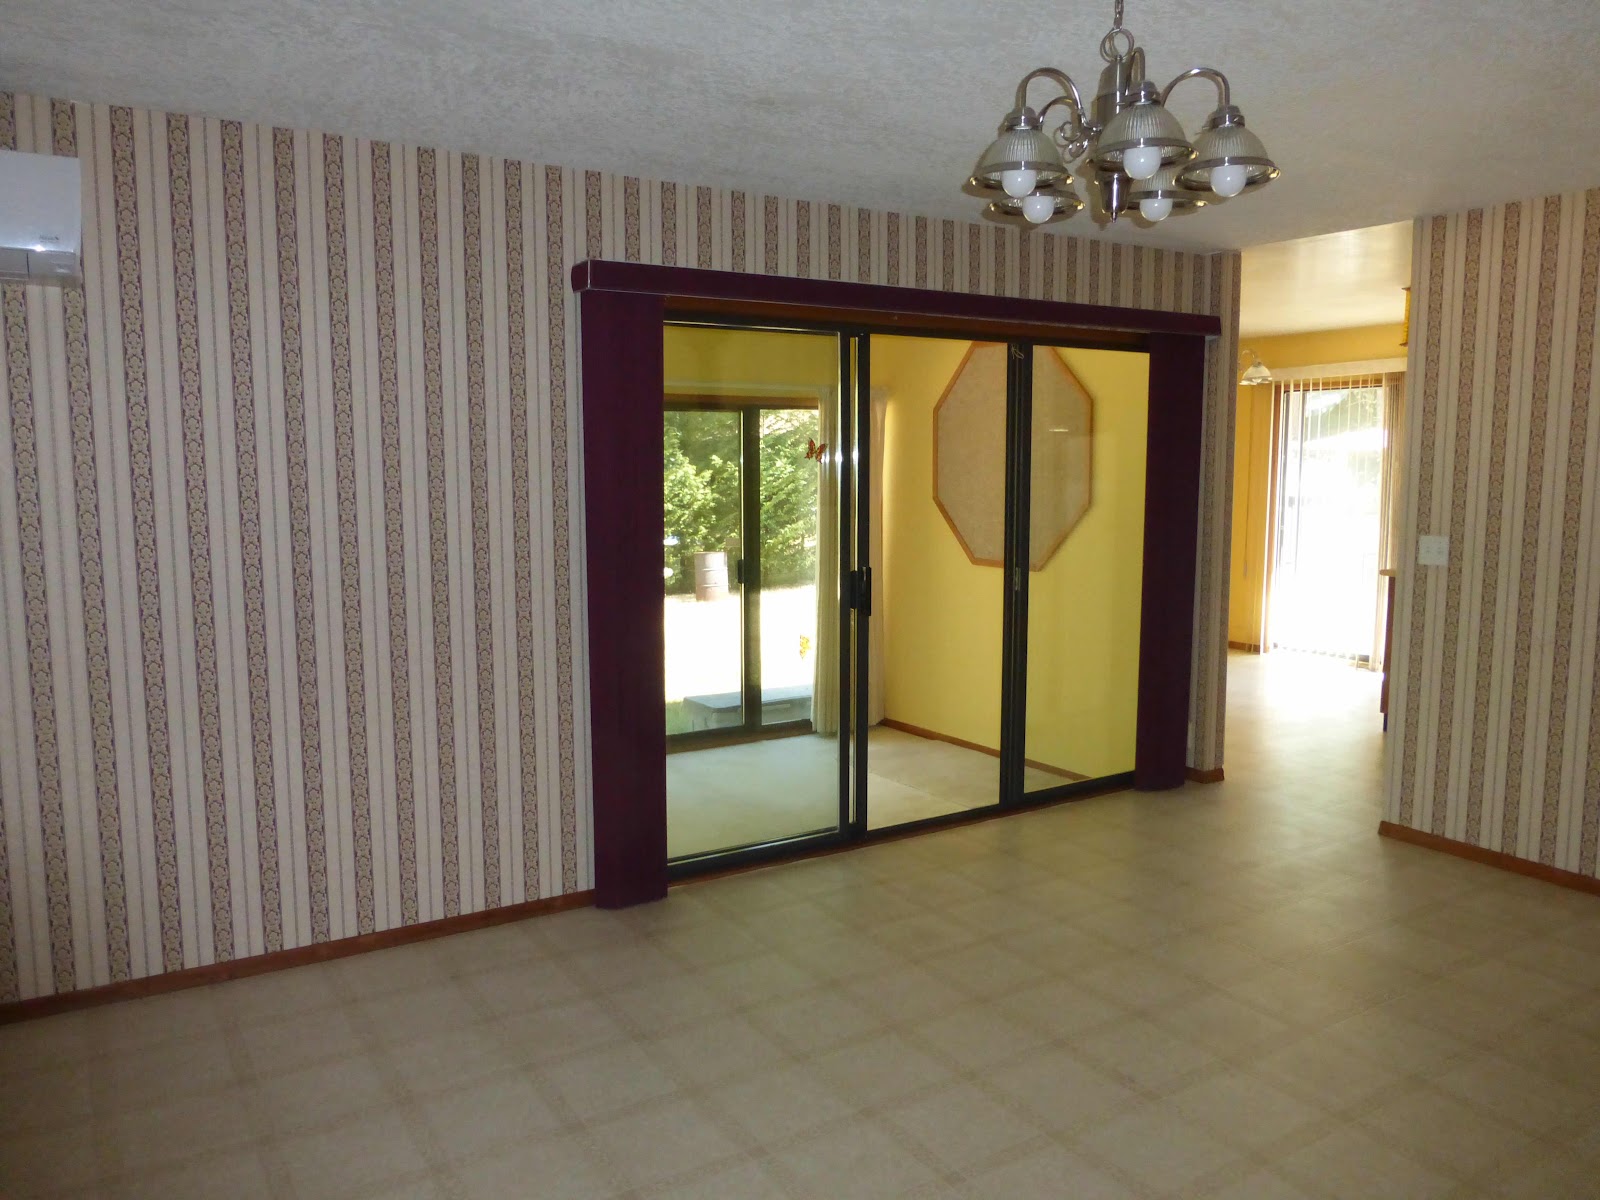
After two months of removing a massive amount of wallpaper, encountering several different types of ‘wallpaper glue’ (I suspect actual glue may have been added to dining room wallpaper paste) tons of staples and struggling to get it all off, I’ve learned a few things. Mostly… it is very hard work. There are no shortcuts. And I wish I had figured it out earlier on as I would have been done in about three weeks at most. 


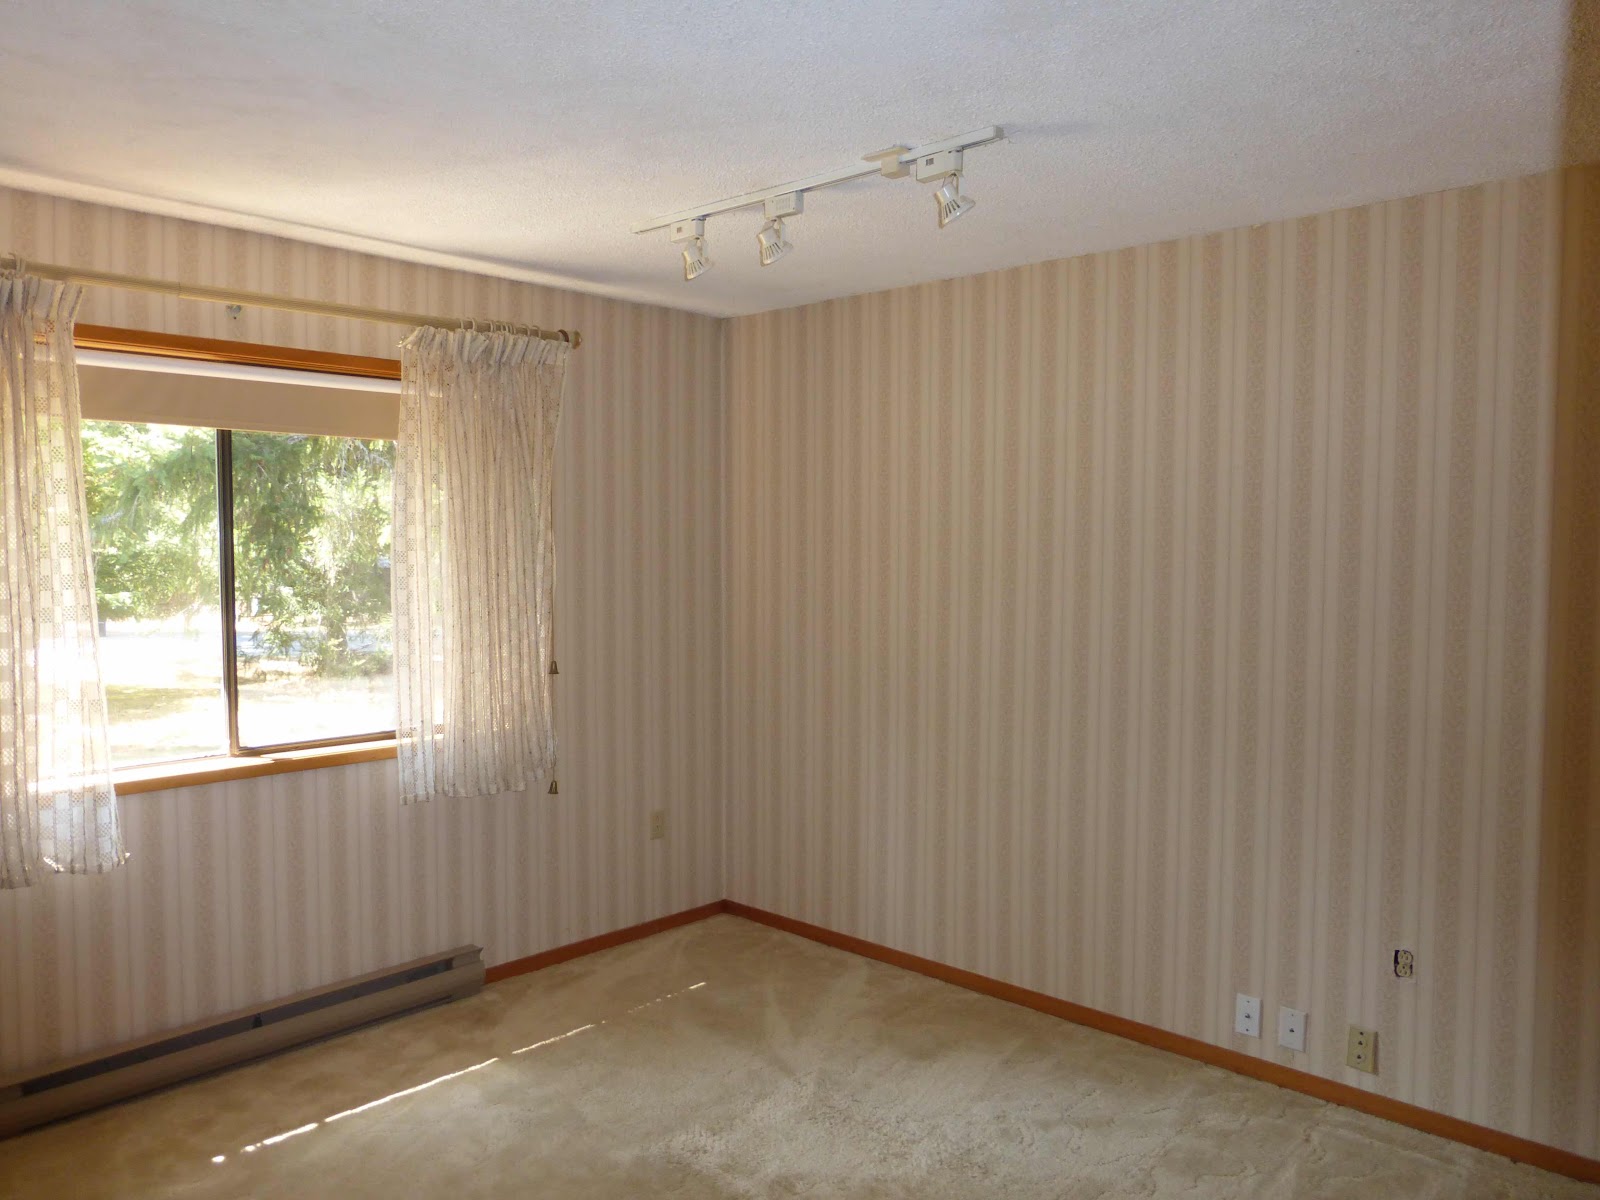
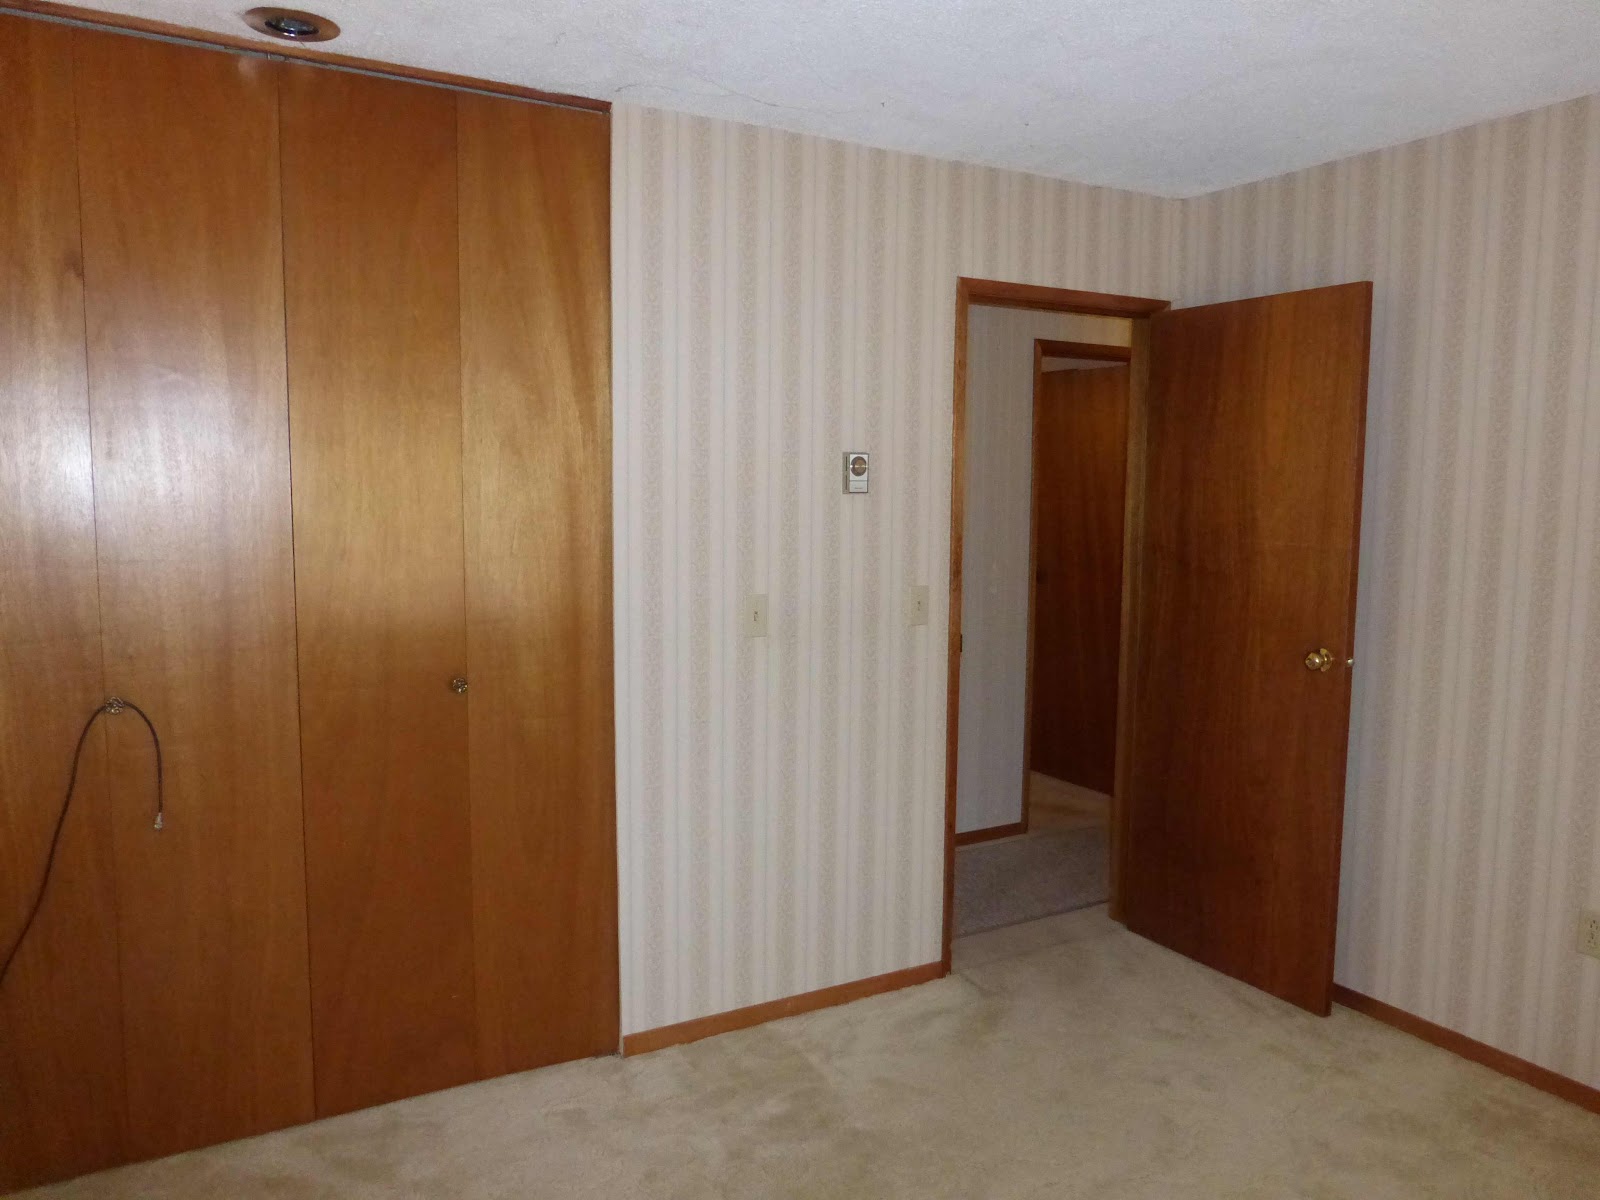
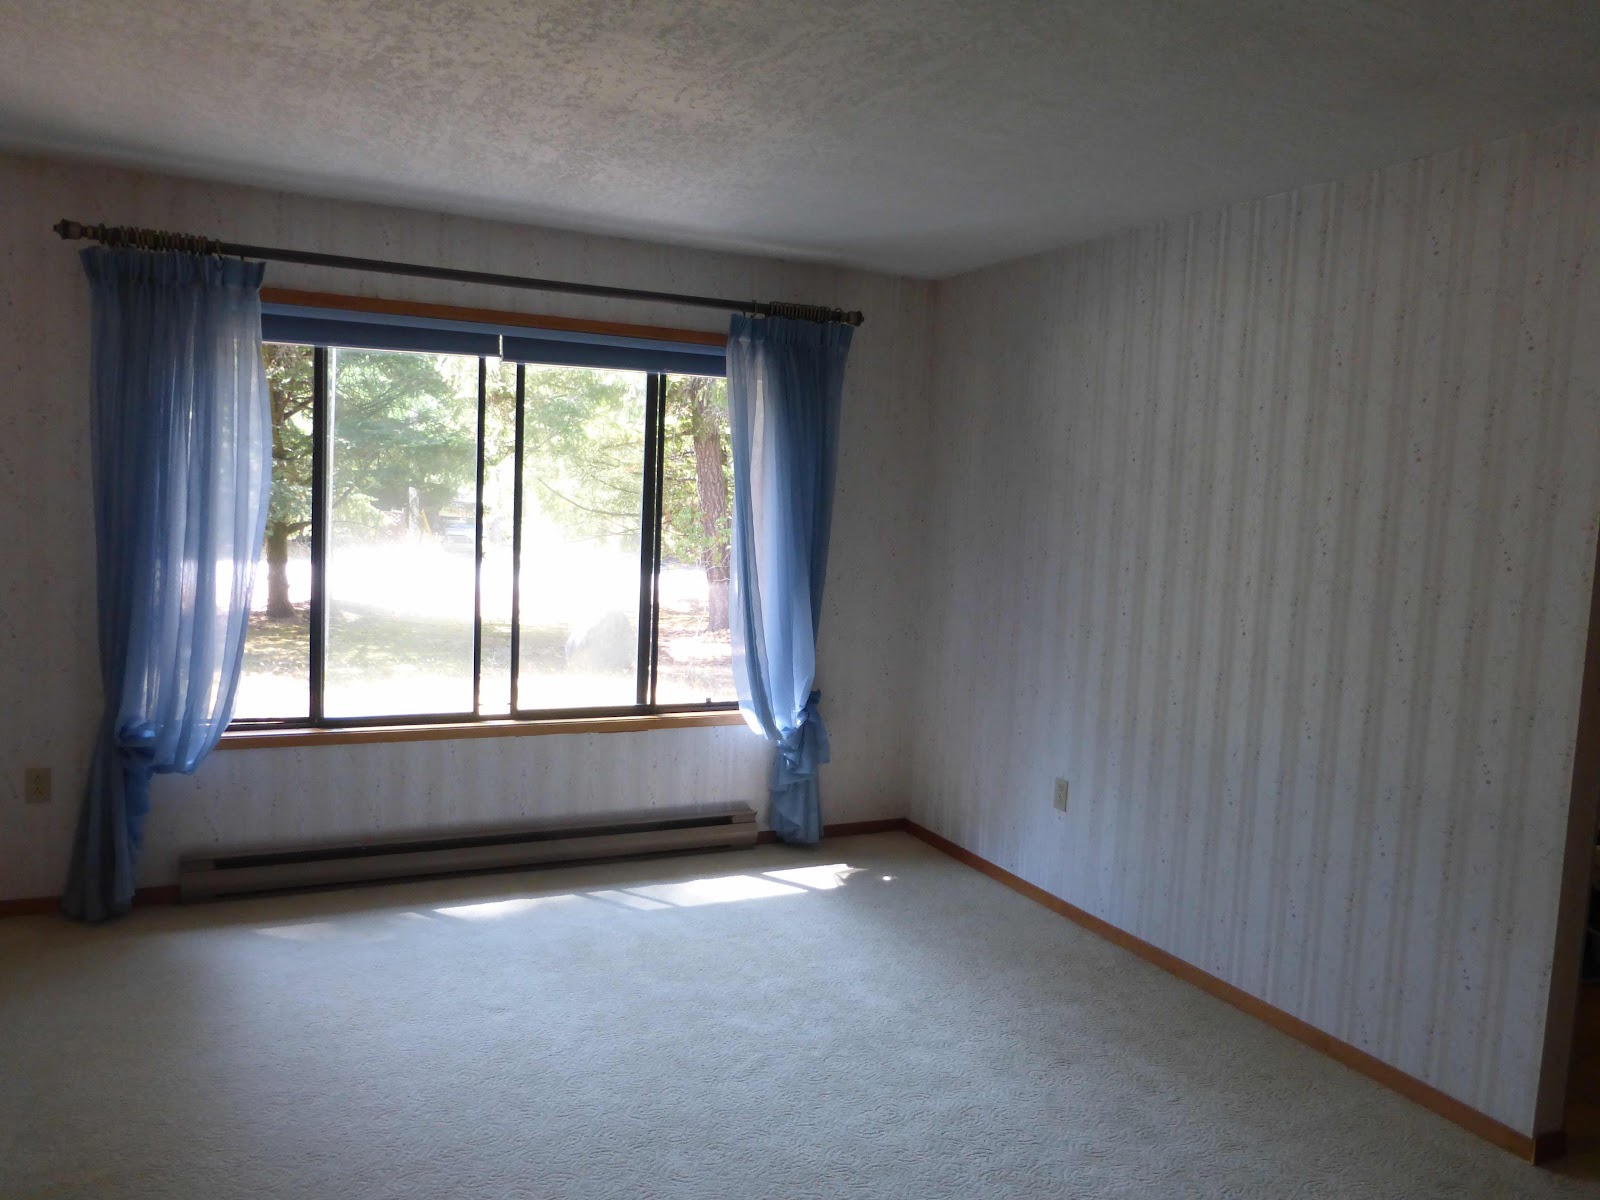
This paper was in all but two bedrooms in my 2000 square foot house. 


If you google wallpaper removal, or wallpaper glue removal, there are dozens of differing opinions on how it should be done. And often what expensive products you should use. Mine is very different from theirs, but I tried them all before I figured it out. Here is my technique. 

One:
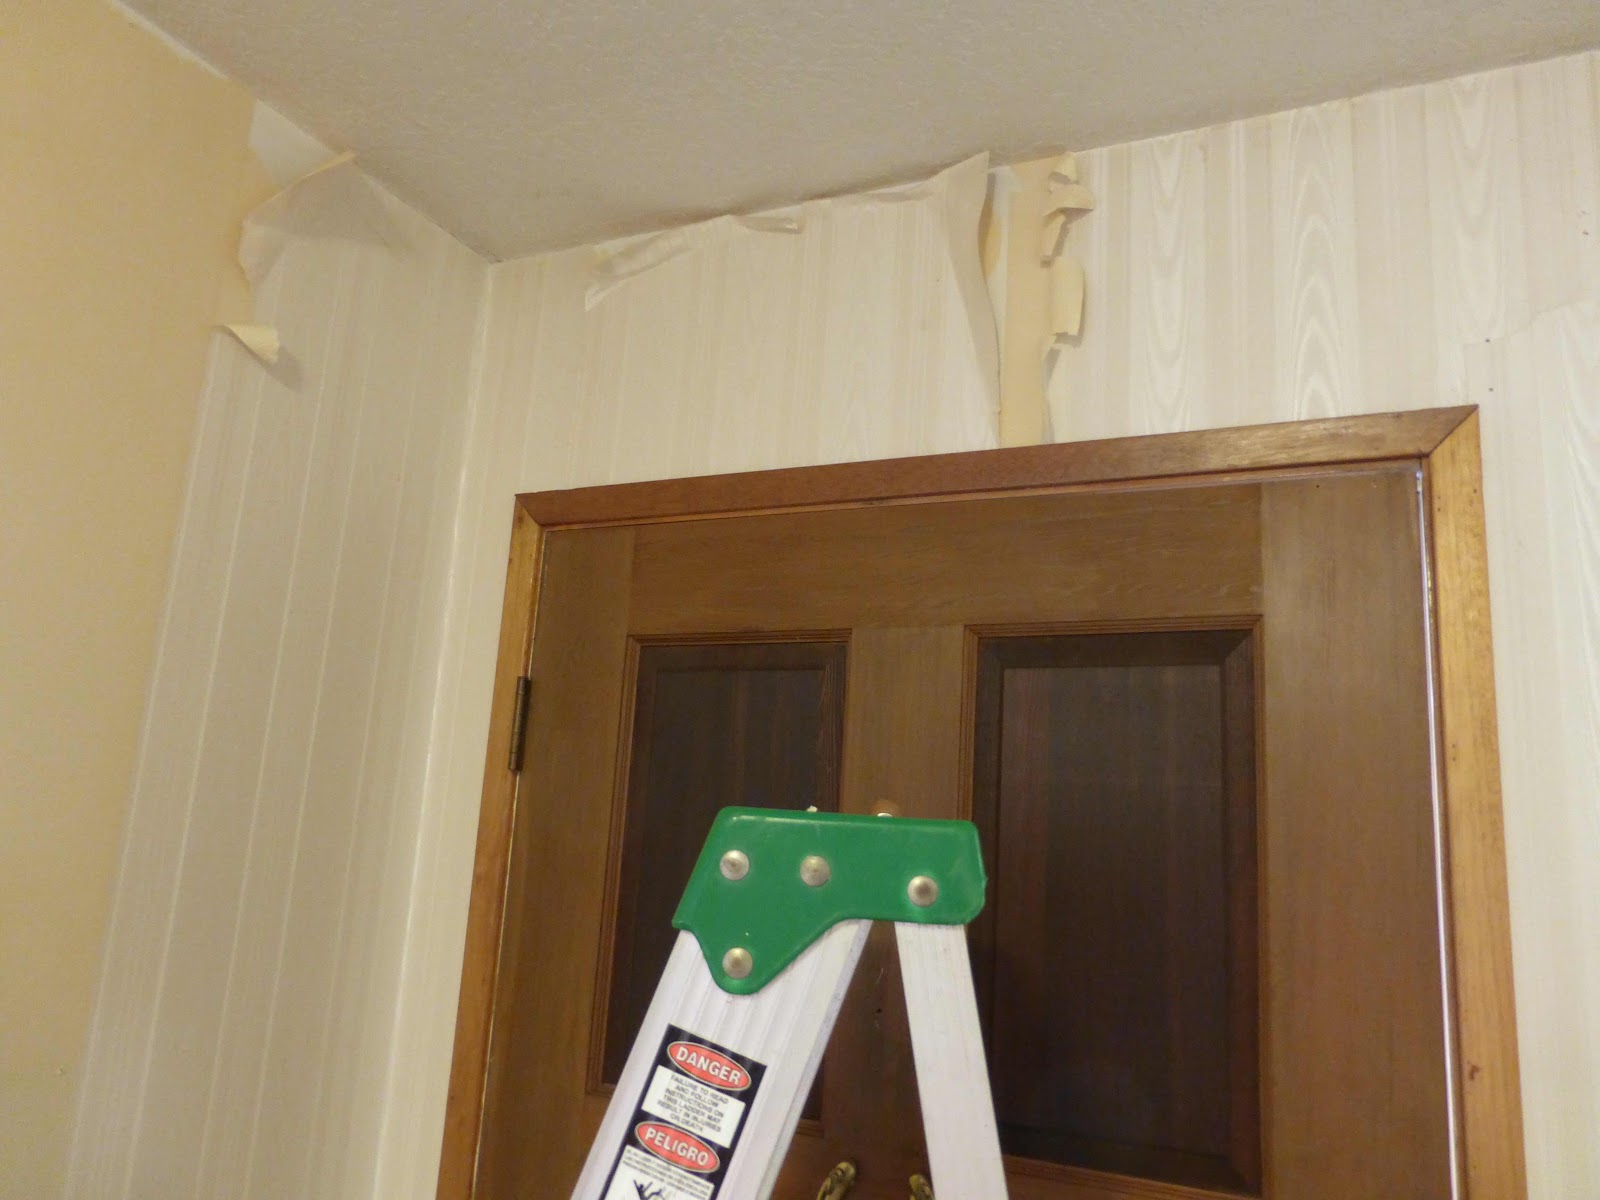
Tarp along the wall. Use tarps for every step. Then peel off the vinyl layer of wallpaper. Water etc. really didn’t help. We just pulled. 

Two: 
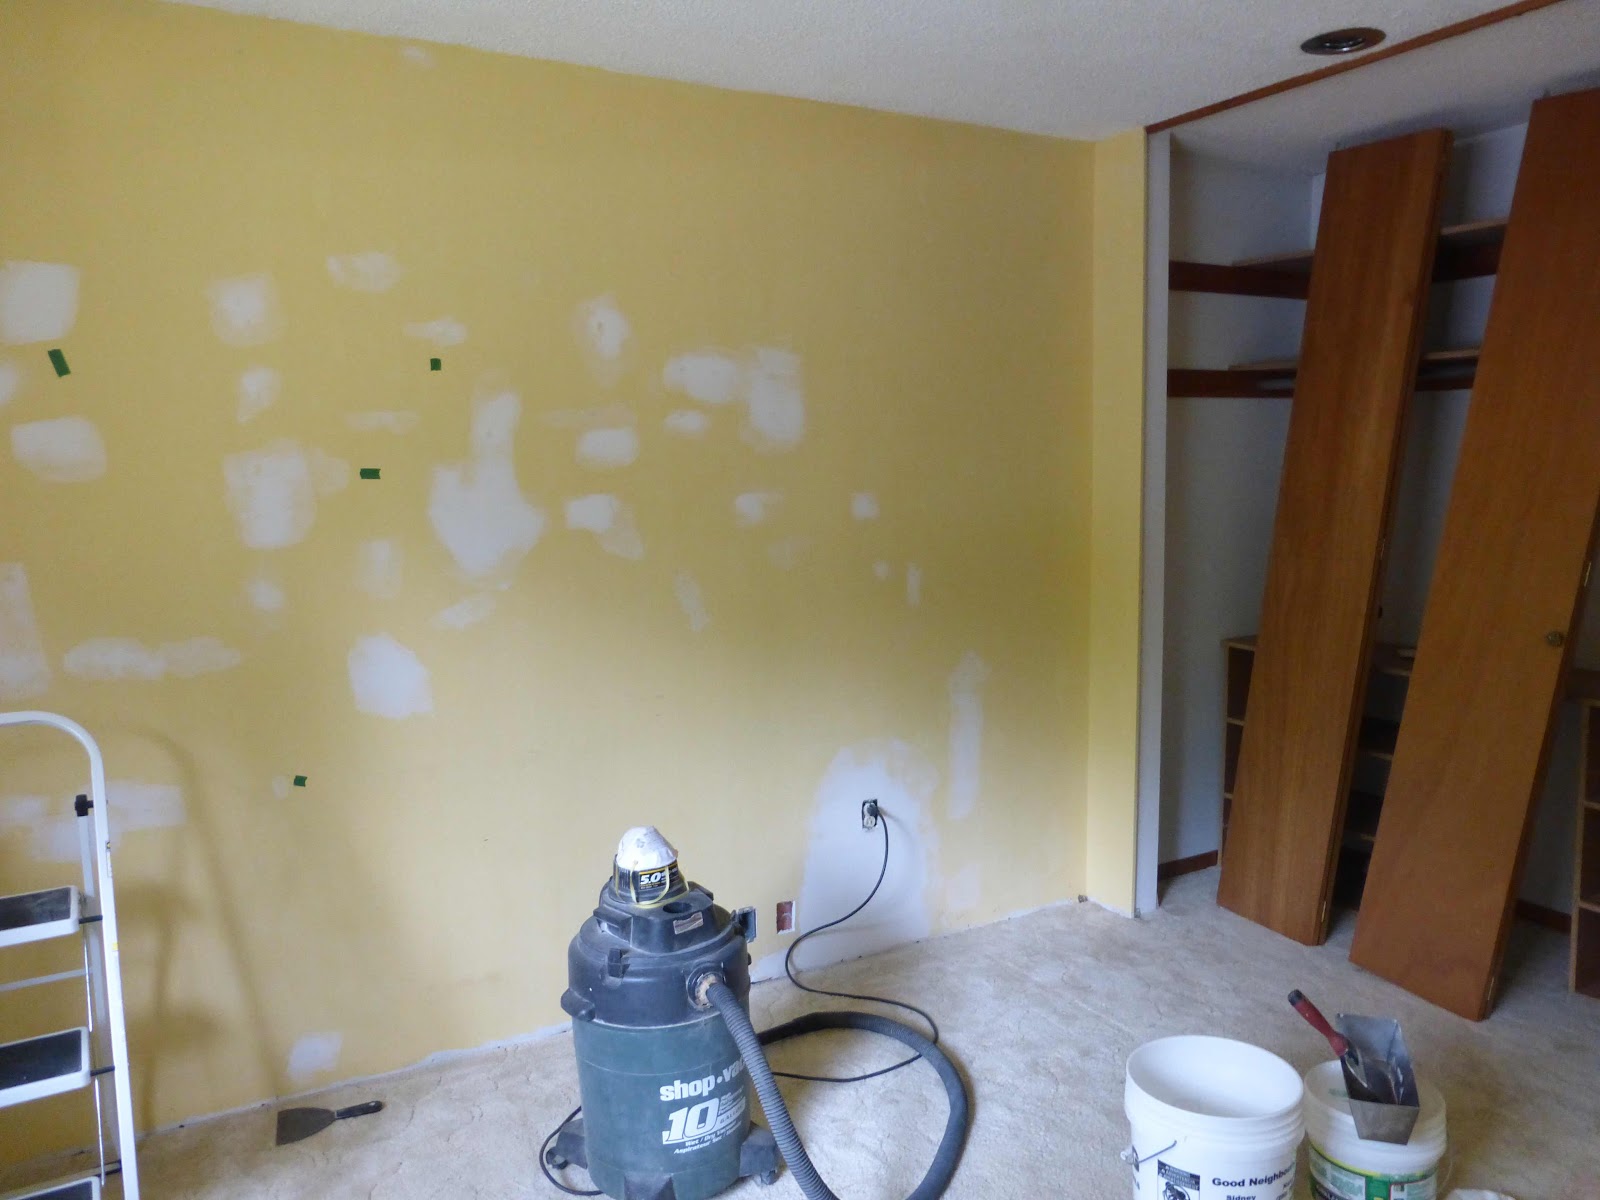
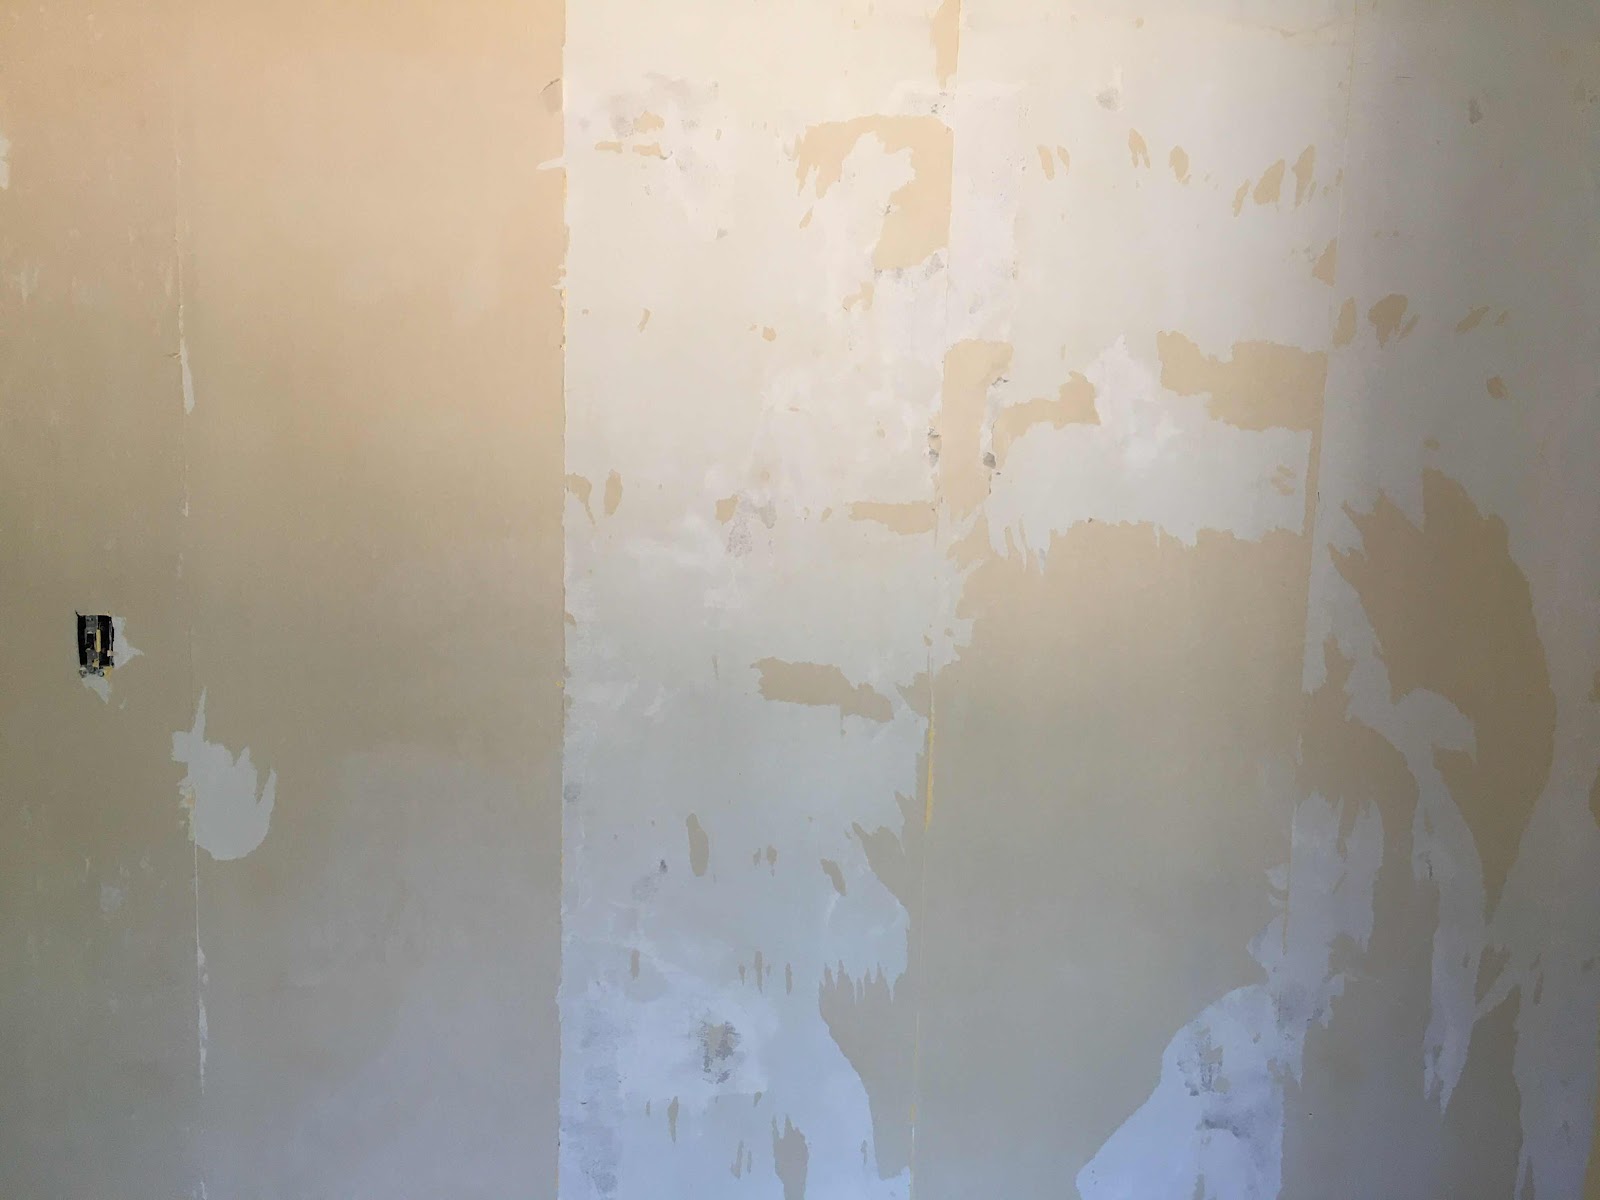
You will be left with a thick layer of paper backing from the wallpaper. Take a garden sprayer, use plain water in it and spray. Do a smaller section of wall at one time. I would say, about five feet. I would start with a quick spray over the whole section. Quickly grab my big peanut shaped sponge and wipe it before it runs everywhere. Then I go over it again with the sprayer, quite a bit more water this time as it will soak in better. If you have a buddy, get them to use the sponge as you spray. Once the paper is quite wet, let it sit for about five minutes. Take a ‘drywall taping knife’ and start scraping off the paper. I used both 4” and 12” ones depending what was working best at any given moment. I found it worked best taking it off in strips of about 4”,  but sometimes depending on the glue used, great big sheets could come off at once. It was a total crapshoot. Even parts of the same wall could be different. 

Three:
Washing off the glue residue: Why is this so important? When the glue gets wet it turns into slippery ‘eel snot’. Gross but that is what I was calling it for two months until I figured it out. Can you imagine trying to paint over it? Because the glue is completely water soluble, first time you put the cloth in the pail of water to rinse it, you are moving that slippery thick glue onto the area you’ve cleaned. I did one wall six times. Fresh water several times with every single cleaning. Frustrated was not the word. It was still quite thick with glue. 

So here is my method. Moisten the wall. Let it sit for a few minutes. Take your 12” scraper and push and drag it on the wall. Some of the glue I found was substantial on the scraper. In this case I used the scraper first and took off the bulk. I only had to do a few sections this way. Most of them had little to no real bulk. I went to my local Ace and bought cheap rolls of what look like blue j-cloths. There were 22 in a roll for under $5.00 so I bought three. I put them in a clean bucket and moistened them in the sink. Tossed them around until they were wet, but not dripping wet. Eyeball a 2x3’ section of wall, take two cloths fold them together and wash section. Turn over cloths and use clean side and do it again. Grab two more clean cloths and repeat. When you have a whole section of wall done, have a bowl or pail of half water, half white vinegar solution. Take two clean cloths and dip in vinegar and wash the same way exactly but you don’t need to do the second set of cloths. Just once and fold and use other side. Feel the wall to make sure the glue is gone. The odd time I would grab another set but very rare. Part of the process is not to go way over the edge of the section you are working on or you will drag that slippery glue back onto your clean section. You get really good at this and it is a lot faster than it sounds. 

Tips:
Never let anything touch your clean cloths. Do NOT wring any excess water in there or you will get slippery glue onto them. And have another pail handy to toss the dirty cloths in. I would stop when I ran out of cloths and put them in the washer. Just plain soap. Don’t dry them, just put in the clean cloth bucket add the same amount of water needed for wall washing and away we go again. 


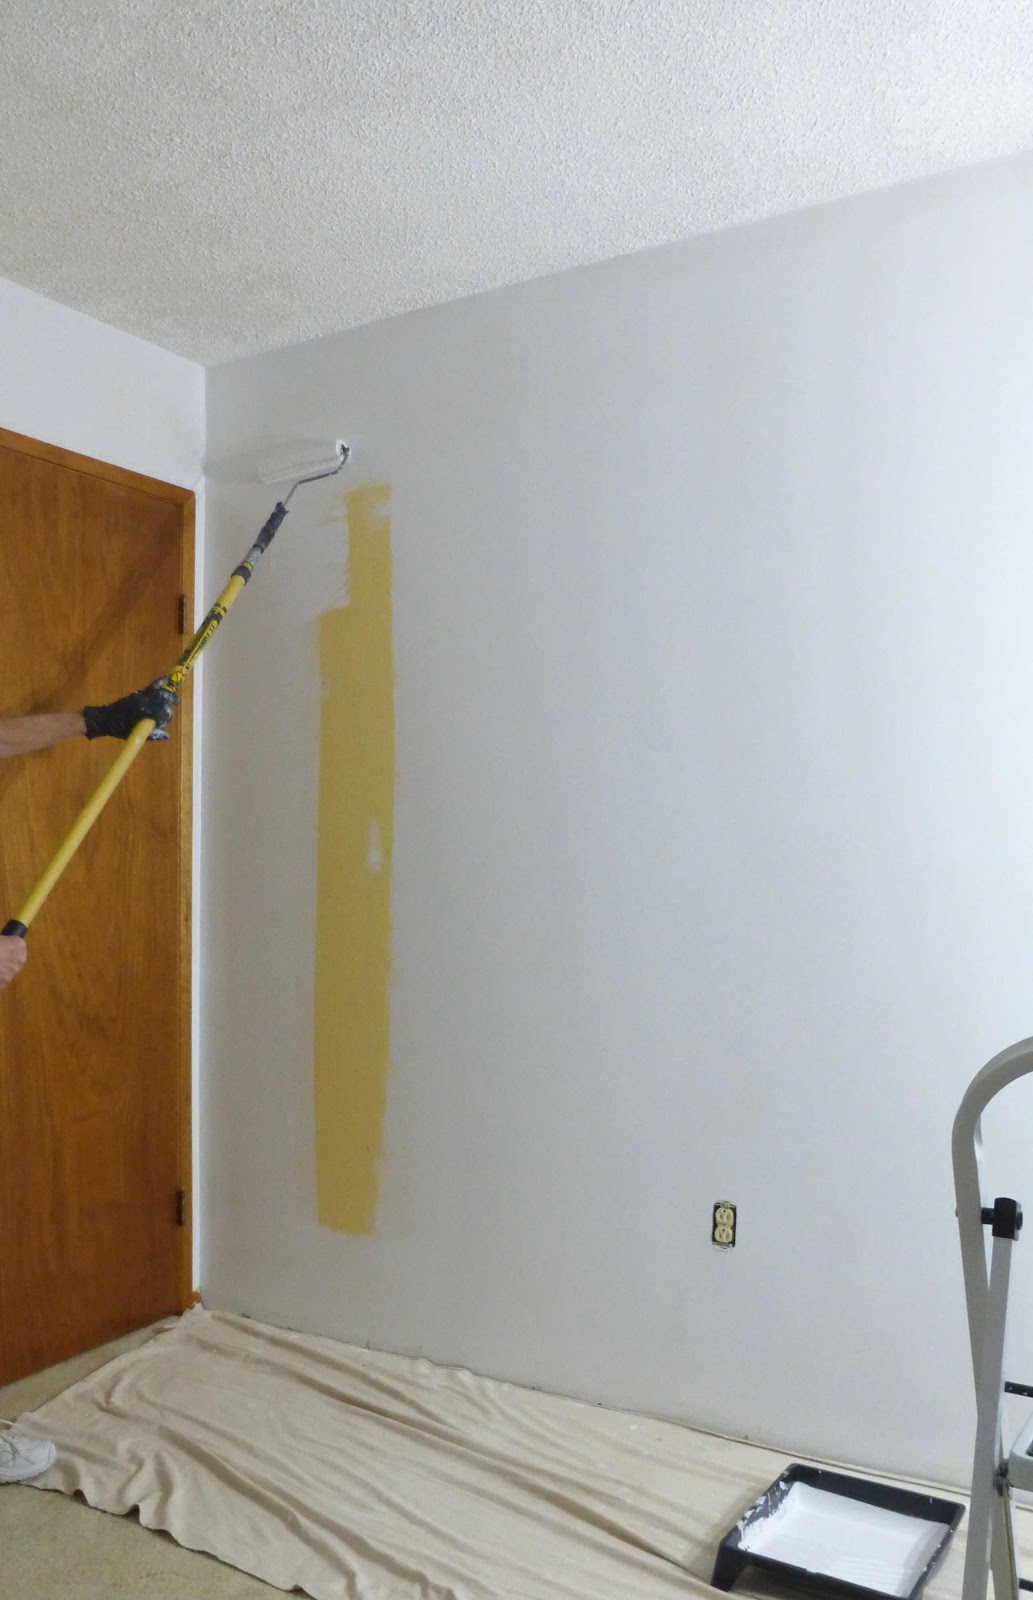
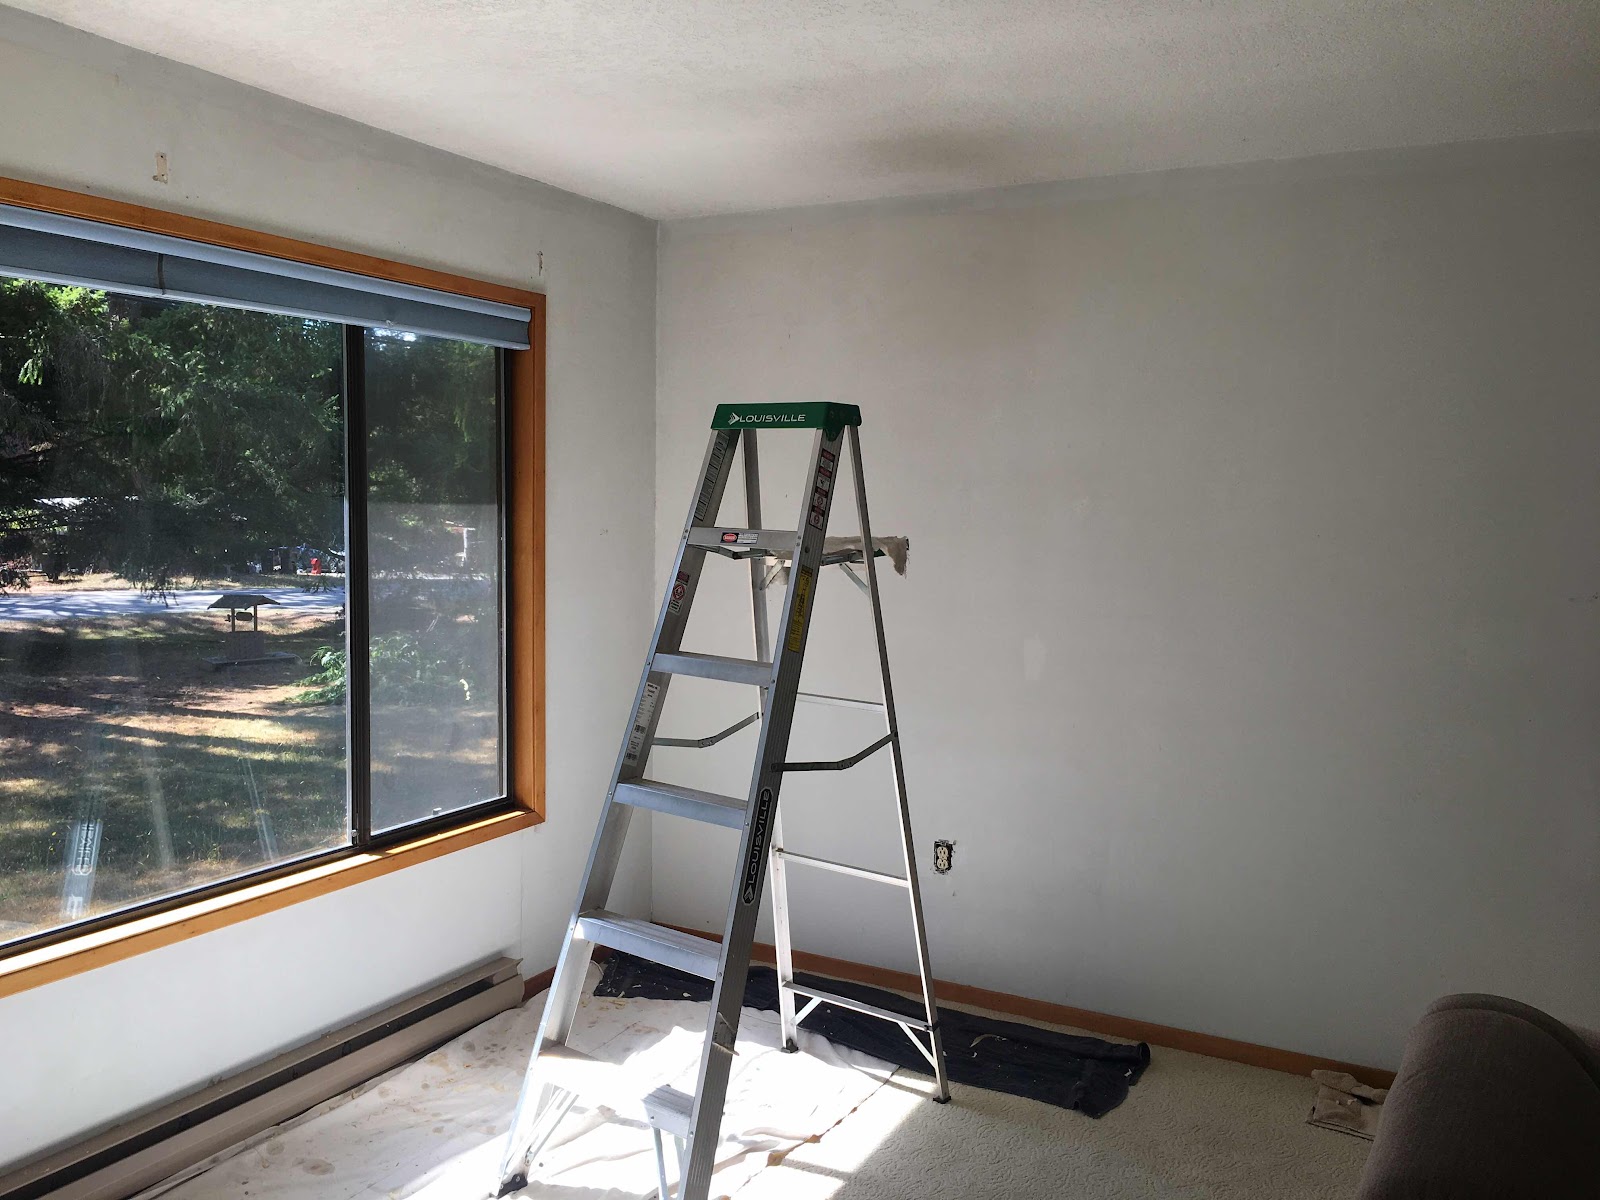
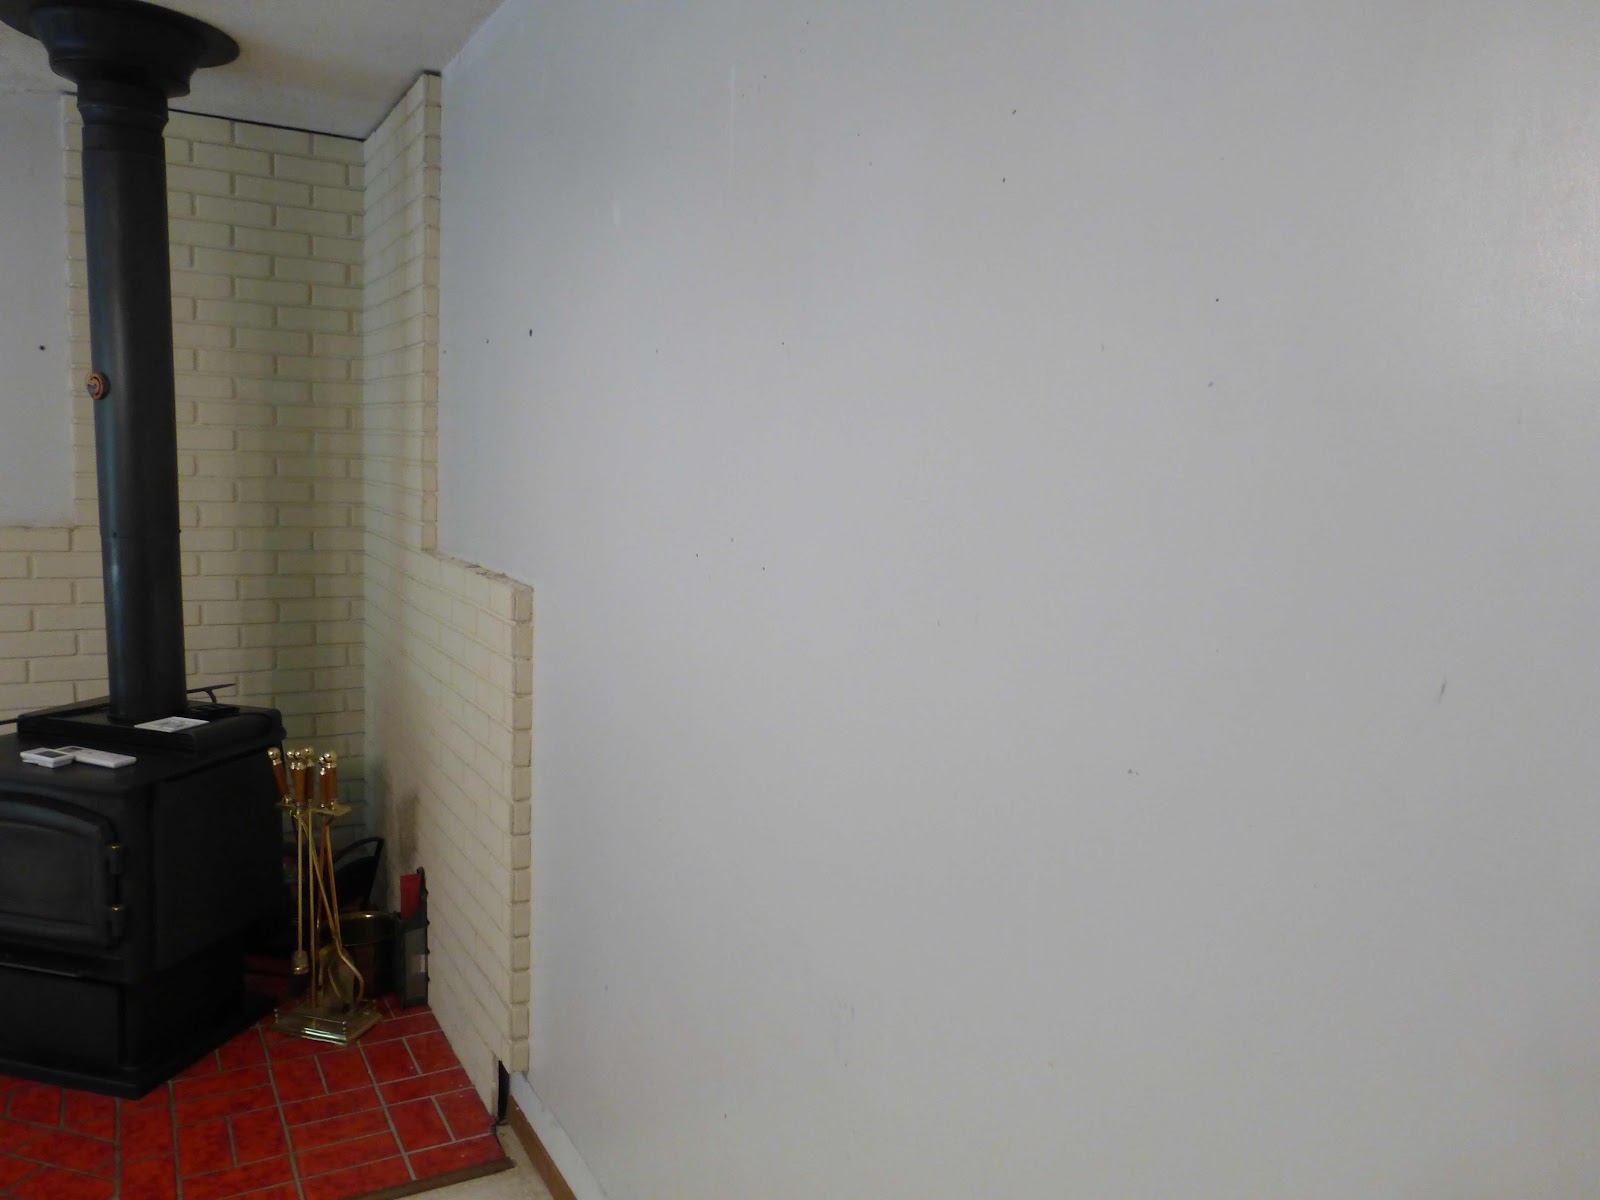
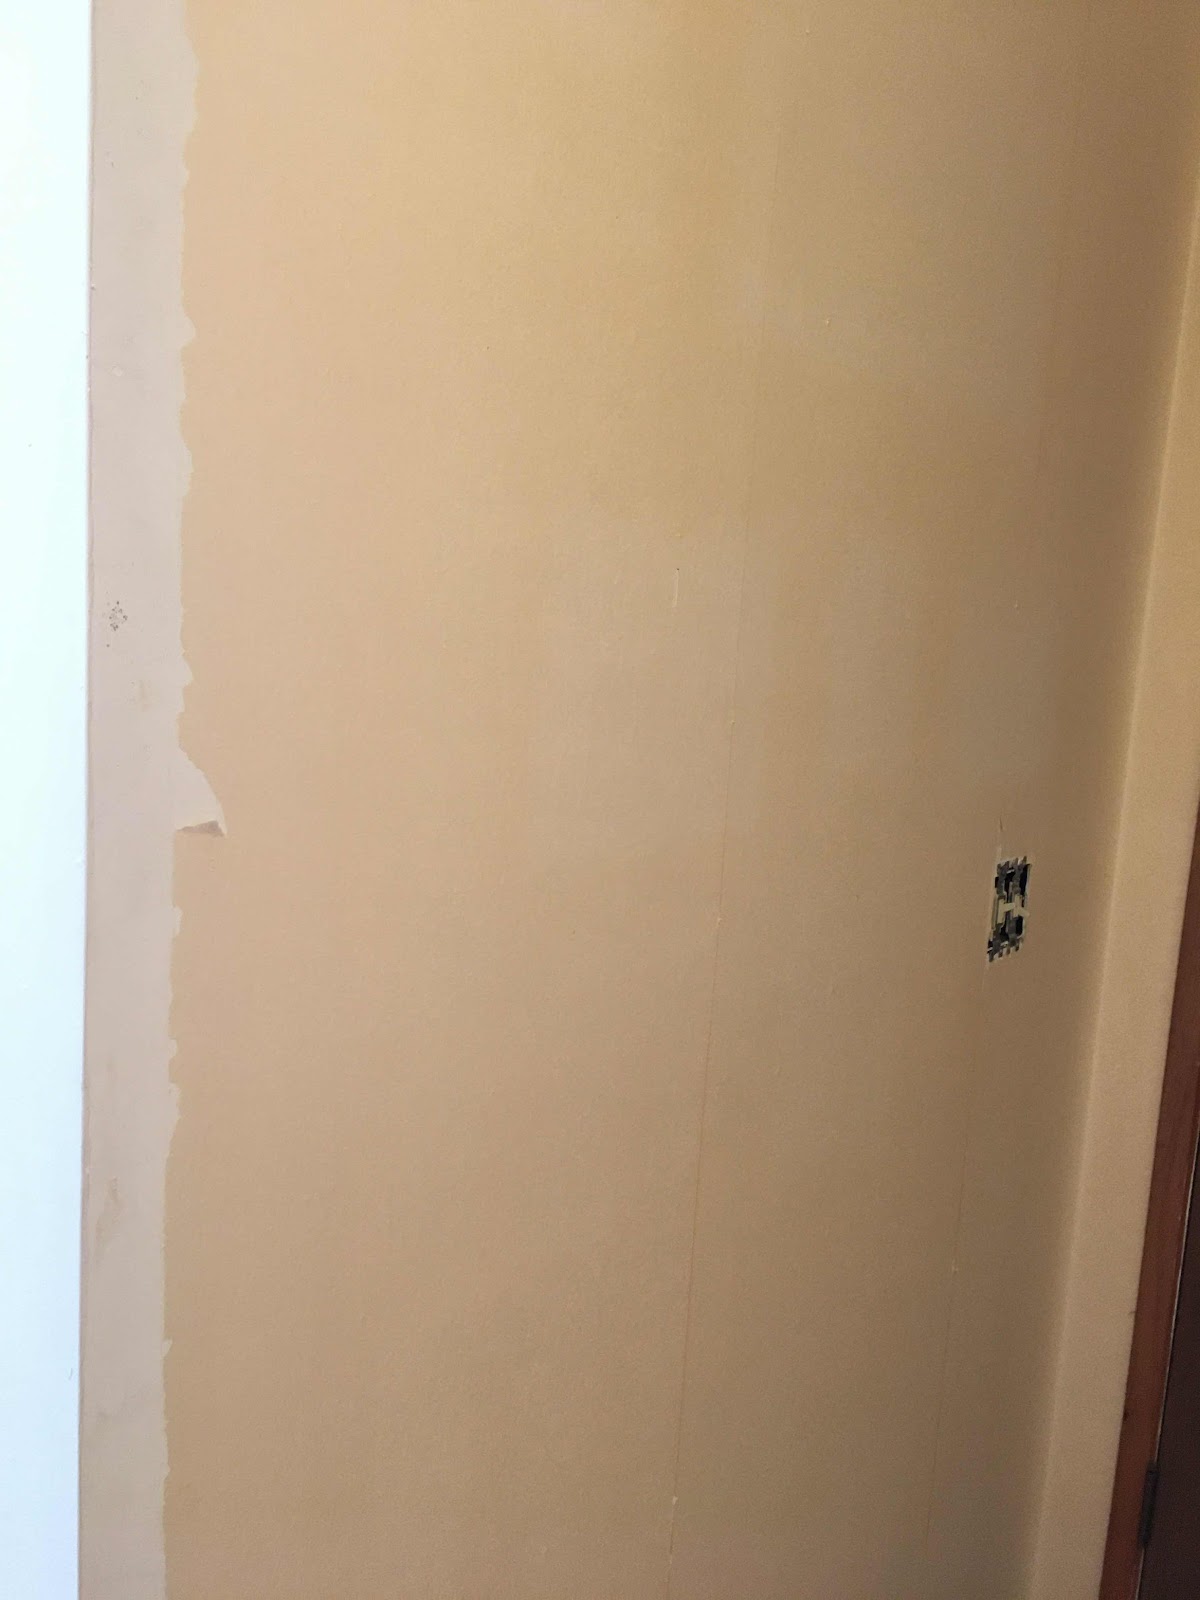
Wallpaper gone and walls clean. Next up… painting. 

Tuesday, November 09, 2021

Switching the whole house over to LED lighting.

I had no idea. It was a comment made to me when I was in the dining room working at the table. My frugal friend said, ‘that chandelier is going to take a toll on your hydro bill, why don’t you dim it a bit.’ I looked at him like he’d grown another head. He then said, ‘it is using about 400 watts right now’. I looked up, did the math and realized he was correct. I brought up my hydro company website and they had a cost calculator. Using the chandelier a few hours a couple times a week translated into about $100.00 per year. I immediately realized too that in a 2500 square foot house, lighting is a huge expense. I did a bit of research and found that LED lighting uses about 1/10th of the actual hydro for the same amount of light. I immediately ordered ten 60w equivalent dimmable chandelier bulbs. They arrived and I put one in and was taken aback. It was SOOOOOO wrong. It was bright beyond belief and a very hot jarring bright white. Ten of them would be unbearable even on a dimmer. (I can’t believe I didn’t take a photo.) So I took them back immediately. I realized also that Daylight meant a very blue light rather than the incandescent warm light we are used to. The other fixtures I had purchased with LED’s built in were clearly on the warmer side of the spectrum. I got a crash course in LED. 

Right away I ordered 25w equivalent chandelier bulbs which use about 2 watts of actual power. They are 2700k which is a much warmer colour. The bulbs arrived. The colour of the light is perfect. The brightness, perfect. There are two issues with the way the bulbs look. The visual. The old ones looked just fine. These ones have painted print on three sides of the glass bulb about half way up the actual bulb. Check it out. And also note the size and bulk of the silver band that unlike the last ones is too huge to hide. The larger wattage bulbs I had that I returned, had a silver band that slid under those white plastic candle covers. 

BEFORE


So I used my trusty scraper, a new blade and a little Windex to use as a lubricant and the ink stamped on the bulbs came off. Thank goodness. If you do this, really take your time and you won’t scratch the glass. 


AFTER INK REMOVAL

Monday, November 08, 2021

Old chandelier cleaned and realigned

My house came with a chandelier in the dining room. There was much discussion amongst those who saw it about whether it should stay or go, should it be painted, etc? My decision was to keep it, not paint it for now.

AFTER


BEFORE

The chandelier was quite dirty and dull. The white ‘candle covers’ were very dirty. It looks to me like it was sprayed with chandelier cleaner instead of washed. So I dismantled the chandelier, my sister and I realigned it so the upper crystals hang in the middle of the lower rather than right beside the lower arms, and I washed everything thoroughly. Many of the crystal hanging wires were facing backwards, stretched right out or bent so badly that I redid about 80% of them. Some needed undone completely and re-wired. I have a great feeling of satisfaction right now. 


I’m going to do a bit of a chandelier makeover and will do a follow up post when it is finished. The parts have been ordered. 

Wednesday, November 03, 2021

A room of my own… sewing, crafting and a desk. Part one.

I have always wanted a room of my own to just go hang out in, sew, do some journal writing, work on my computer… you know what I mean. That has finally come to pass. I love it. Here is the epic journey, from wallpaper, bad lighting, closet door to the ceiling…to this! We are getting there. 

BEFORE
As with most of the house. Striped wallpaper. 

Wallpaper and closets right up to the ceiling. Very confusing. 

Wallpaper removed and very bright yellow paint revealed. Lots of patching to do. 

The closet has been closed off to give it to the master bedroom. 


Last of the yellow paint!

Friday, October 22, 2021

Oh my gosh. Two months in….. wallpaper and glue cleaned off and ready to fill holes and paint.

I thought I had a week or two to remove wallpaper and be ready to paint. It actually took two months. I am unsure how many types of glue were used and some didn’t really seem to be wallpaper glue at all. And more staples holding up the wallpaper than I could count. But, here we are now. All finished. I cannot wait to see just one room painted in Benjamin Moore Gray Owl. But first, we have dozens and dozens of nail holes to fill and damaged walls to fix. Theeeen we can paint. We’re getting there. 


Our little sitting area when we are taking a break from working. The walls still need patching and repair, but the wallpaper is gone and walls cleaned. It is wonderful to sit in there and imagine what it will all look like soon. 


This is the room before. With wallpaper. 

I am very anxious to move to the next task. I think I need to plant something!!

Sunday, October 10, 2021

First planting in the new garden… at the new house

I am so excited!! We spent a couple days putting together a new raised bed, of the many yet to come, so that I could get the garlic in for next July harvest. I prefer planting about September 15th, but will go as late as October 15th. So it needed to happen right now. The deer fence isn’t up yet, but the buried garlic bulbs should be safe until it is. 

This year I lost all of my old garlic to what seemed to be simply a failure to thrive. They were small and stunted and a lot had bright yellow cloves. So I disposed of the lot of them and just used the other garlics from plantings from the nursery and farms. Here is the bowl before they were separated. They are HUGE. Some are Music and I think some are Red Russian. 


This new raised bed is made with our usual formula. Small fallen alder trees in the bottom. A thin layer of soil. A sprinkle of Urea. A thick layer of soil. A heavy sprinkle of Fish Bone Meal and a tiny bit of Urea. Then about five more inches of soil. With a bit more Fish Bone Meal in the top layer. 

This year I have planted 45 nice big fat cloves. They are exactly 6” apart. I poked 3” holes with my dibber and positioned the cloves so that each had about 1/2” of soil over it. Some cloves needed a bit of soil pushed in the hole so they didn’t sit too low and other had to be wiggled in a bit further down as they were HUGE. All in all, what a fun day planting in the rain. I love everything about growing garlic. 

Precision holes poked

Laying out the garlic


Garlic planted and wire down to keep the wild turkeys from scratching in the bed

Wednesday, September 22, 2021

Old Mrs. Butterworth syrup bottles


I have a wonderful 5’ tall crawl space in this new house I bought. There was a small amount of stuff left in there by the previous owners. I found a treasure. I love old things like Pyrex. So these old wonderful Mrs. Butterworth syrup bottles remind me of my childhood just like Pyrex does. The largest is about 11” tall. The smallest about 9”. I always thought they looked like glass dolls. 

Friday, September 10, 2021

Yet another Leylandi Cypress hedge… gone! Beautifying the garden world one hedge at a time.

My new house came with a Leylandi Cypress hedge. You may recall my old posts about the hedge from hell at my Sidney house? That hedge (row of HUGE bloody trees) was my nemesis. Refresh your memory here. This one was only eight years old and were less than a foot tall when planted. They were already about 17’  tall and the largest trunk was about 9” across. So I immediately booked a backhoe operator as soon as he was available and our fire rating decreased so machinery was allowed again. That day was yesterday.


You can see the hedge through the window. It doesn’t look like it in this Realtor listing photo, but the trees are about 15+’ tall. 

Some of the branches trimmed off for chipping. 


A twinned fir tree that was cut down ages ago. 


Too heavy to lift and take way, but roots are out for us. I’m betting it will be slow tedious work with the chain saw. 

Saturday, September 04, 2021

A little holly tree of my own

When I bought my house I didn’t really give much thought to the very few plantings as most were in terrible shape, not my style and would be coming out. I noticed this tree that was full of dead branches and really barely hanging in there. I inspected the leaves and thought it was perhaps a laurel. When I took a few minutes one day and really had a good look at it, I looked up. In the green leaves were some, not a lot, green berries. My excitement level went to a ten. I took a photo and zoomed in. OMG, is this a holly?! I started looking at the leaves again. It is obviously older and they lose that classic pointy holly leaf shape and smooth out. But sure enough, it is a holly. I am pretty sure an English Holly. My favorite nursery (Dinter) informed me a while ago, that because English Holly is now considered an invasive species, they can no longer sell it. I have been trying to propagate cuttings from mine at my old place. In a full year, I did get one variegated to take, but not a single green. So this is pretty thrilling for a girl who loves her holly. I have fertilized it, given it lots of water, trimmed off most of the dead tips and branches. And now, back to wallpaper removal. 


Sunday, August 22, 2021

Wallpaper removal. Yes it is as much work as people say it is!

I have just spent the first few days in my new house. The first thing I noticed is how big it seems. Also, with my incredibly terrible sense of direction, I get lost. True story…on day one, I headed from where I was, to go somewhere else. I walked around and did a big loop through three rooms and found the place I was looking for, which was actually right beside the spot I started from. It had been right behind me. I have been dealing with this ‘directional disorder’ my whole life so I just laugh. I did shake my head, because this was bad even for me.

Wallpaper removal is a nightmare. There is quite a bit of it in this house and three of us have been working at it for three days and have two rooms done. I think my sister is right with her one week estimate. 

Update: two months have gone by and I am still cleaning glue off the stripped wallpaper walls. I took a total of maybe seven days that I didn’t work on this. “One week estimate”… I snort with laughter. 


We are now working in a hallway and kitchen. 


Thursday, August 05, 2021

I love garlic cleaning day!!!

Since I first started growing garlic 10 years ago, my favorite part of it is cleaning day. Today was that day. By far the rock star this year was the Music Garlic that I got from Wild Rose on Gabriola. Look at the size of the one in my hand. For the record….my hands are not petite. The bowl of garlic is the seed to plant this fall. 


Large beer mug for scale. 

Tuesday, July 27, 2021

My first ever Phalaenopsis Orchid to reflower


I have been growing orchids since I was about 18. Roughly 47 years. I have grown lots of different varieties, but the one thing I could never do was get a Phalaenopsis to re-flower once it’s initial flowers died. Until this week. At the urging of a dear friend I bought an LED grow light panel and hung it in front of my temporary orchid stand, and within about a month the baby spike showed itself. I am so thrilled to see this darling. I adore the pink. 

Monday, July 19, 2021

Can you believe it, I bought a house!!!


I am lucky enough to live on one of the Gulf Islands off the West Coast of Canada. Quiet, rural, small… And I’m also lucky enough to have had my offer on this ‘full of potential’ house accepted. 

As you can see the .37 acre yard is pretty much virgin and that is exciting. The soil in this area is nice and soft, but I think there will be much amending to do. (You will notice the two very stunted lilac trees in the lawn) But that is a project I am excited to start. What it does have here, is water. Which is quite rare on the island. 

I am anxious to share this journey with you. I take possession in about a month, so we will continue this part of my story then…